Showing posts with label organizing. Show all posts

Friday, May 16, 2014

Have bag... can scrap!

So as I posted previously, my husband surprised me with a trip to the mainland to scrap with my awesome scrappy friend Sweet Scrapista last weekend.  His challenge to me beforehand was: "you know that bag you have?  Fill it up with stuff to scrap."  Yah, sure no problem, as every scrapper knows there is the eternal battle of what to bring, what to leave, do I have everything, etc.

Luckily enough for me, I had prepped a bag to do Project Life on the go earlier this year and so had a great head start.  Sweet Scrapista gave me the idea to do a PL bag and Mercy Tiara helped me figure out the how (she had a great YouTube about using the Bag in a Bag to take stuff on crops, she didn't use it like I am but the SECOND I saw it the idea formed in my head!)

So, I made a list of what are the absolute essentials I need (oh, and bought a Bag in a Bag) and then after using the bag a few times casually I added more and kept a running list of additions.  I just got a small Simon Says Stamp order in that filled it out the rest of the way and so here it is:

ALL the stuff I stuff into my Bag in a Bag (sorry it's blurry but I'm not pulling it all out again, I did edit my foot out of the shot at least! LOL)

For PL I always use small alphas, write journalling, stamp on dates, round corners, staple, ink, need adhesive, etc... I use book rings for all my embellishments now (except loose ones of course) and the one on the bottom right is all leftovers from kits to use up.  The bags are extra clips, flair, and labels, etc that are loose.

So here is me actually getting almost ALL of this into the tiny Bag in a Bag (yay, these aren't blurry, my iPhone is going!):

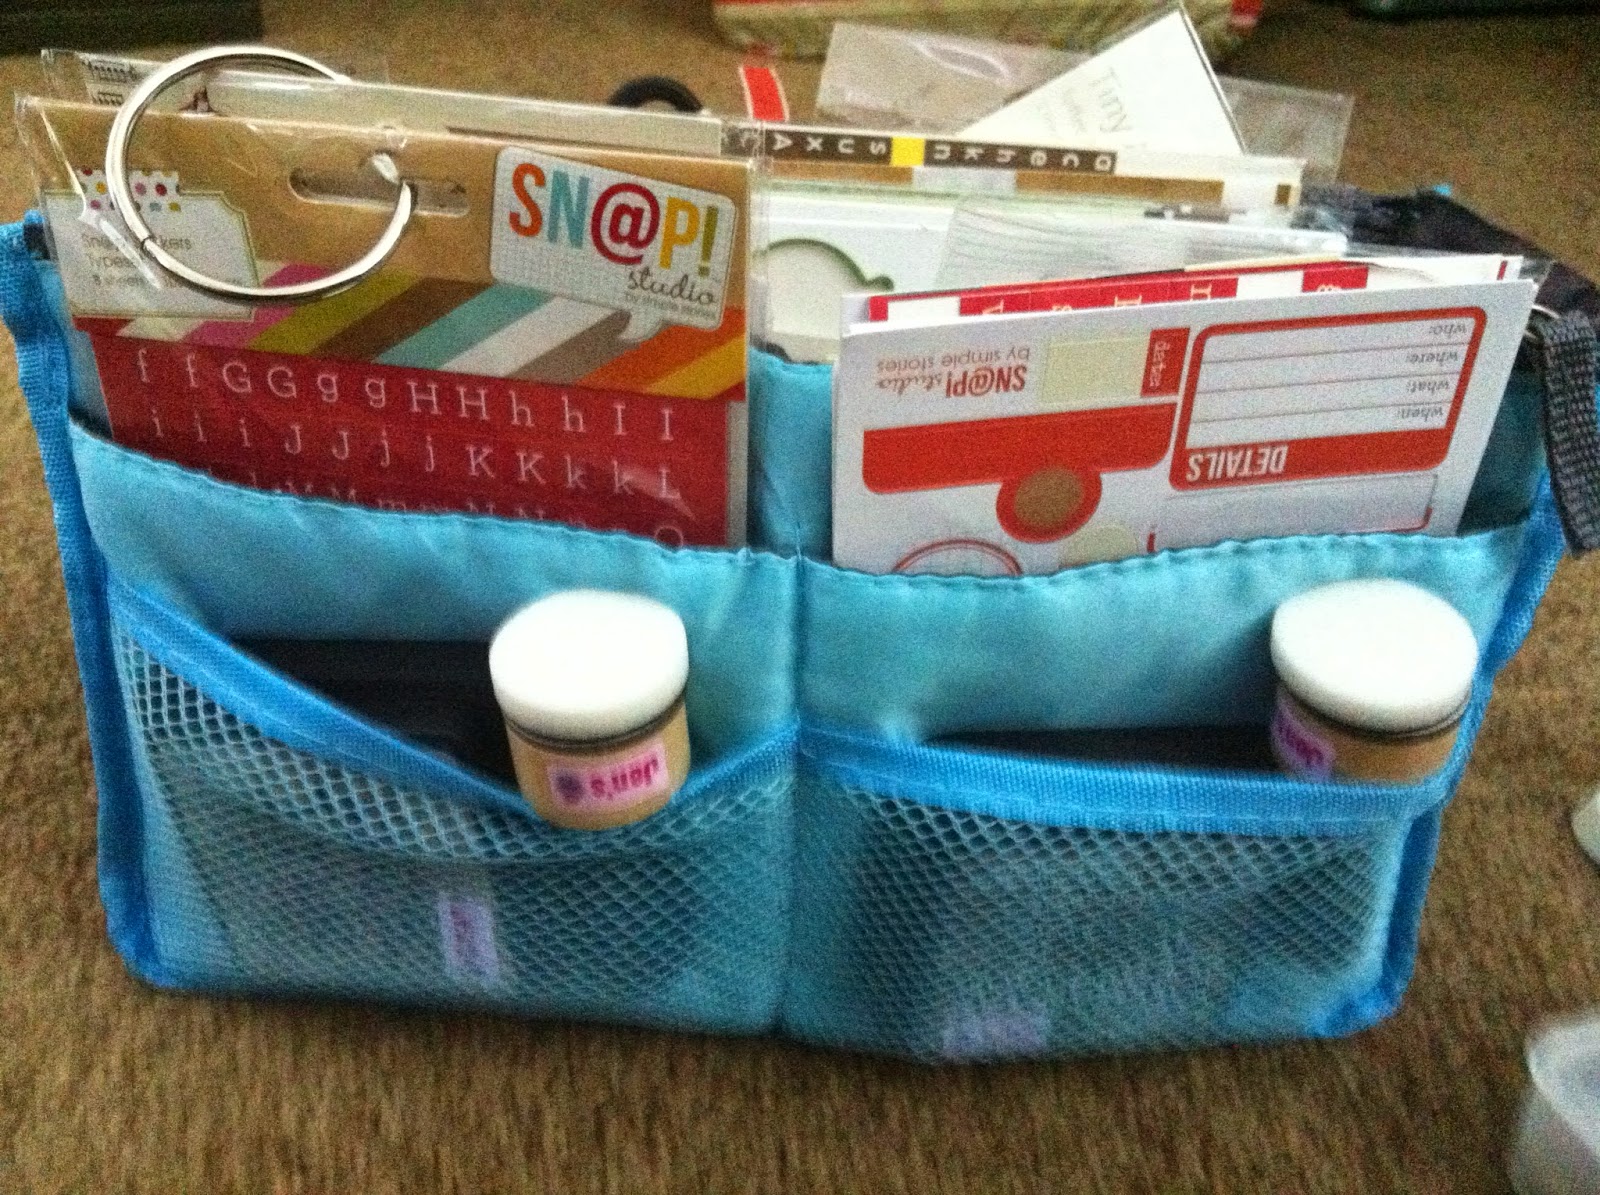
(note my new Tim Holtz mini ink applicators!  So cool! Perfect for this bag as the regular sized ones did not fit well at all)


I then use a bag I bought at CKU Seattle 2 years ago, an empty PL page protector box, a portable trimmer and an empty Studio Calico PL kit box (don't get their kits anymore, but the boxes sure are awesome) to round out my "Go Bag".

I use the SC box to put 4x6 and 3x4 cards, as well as matching washi tape (fits a lot of cards and tape!!). The PL page protector box has empty page protectors and an envelope of printed photos sorted and ready to be added.  With all this I can do PL anywhere (like waiting on kids or on the ferry)

I took this bag and 2 loaded up layout boxes (another post to come on how I prep layouts for crops) and I was able to scrap all weekend long with no issues. The ONLY thing I needed was 2 sheets of white cardstock when I decided I needed to mat some photos and hadn't included it in my prep. Luckily Sweet Scrapista has a bit of a stash of supplies (ahem, understatement, ahem, cough, LOL)

Here's the packed bag:
(see I labelled that SC box - it says "cards and washi" as I do have another empty one I sometimes use too.  I like using washi tape to label stuff like this as it's easy to take back off and easy to write on.)

Hope this makes sense, if not feel free to ask in the comments!

Jen

PS I also ordered myself label's that simply say "Jen's" from Mabel's Labels.  I add them to all my supplies that go to crops and it is way to easy to get stuff mixed up and that makes it very simple to know what is mine and what isn't!


Wednesday, November 6, 2013

Kit Storage

Sorry it took me so long to get back to this. I had company all last week and... well, I wasn't able to sneak away up here and finish this off.  So here I go again now!

First, my last 2 months of kits are stored in empty Project Life page protector boxes.  This is a relatively newer system I'm working on.  You can see them there:


To the right of my Project Life stuff there are boxes with labels you can't read :)  I use a bit of washi tape on the ends and label them with the month and name of the kit that is in it.  These are my Sept and Oct Noel Mignon kits - which is my montly scrapbook kit and the only kit I get currently. These kits are HUGE and keep me more than going all month long for both layouts and Project Life spreads! 

So here's what is in these boxes:


Not so helpful but that's the view from the top.  I completely and TOTALLY stole this method from Tracey Banks (Mercy Tiara).  She hangs up her alphas and long sheets on a peg board while I leave it all in the box but otherwise, stolen from seeing her work in her You Tube process videos. And ironically, about 2 weeks after I started this, she did a video about her kit storage.  It was funny as I'd pieced it together first! (wish I'd been lazier and waited until after this video... but I didn't know she was doing it, LOL)


So the bottom of the box has my cardstock, then patterned paper (this kit is well used), then my alphas. This kit has a photo tucked in as I was messing with a layout and it all got shoved back into the box. The ENTIRE REASON I use this method.  Easy, fast clean up but it's all still right there when I am ready to pull the box down again.


So, the silver tray has the larger embellishments in it.


The crystal dish has the smaller embellishments in it. All easy to find and poke around in.  My very wonderful and thoughtful friend Sweet Scrapista bought me the tray and dish.  I had told her I started using this for kits and funnily enough so had she (and we hadn't even talked about it with each other!!).  So when she saw these, she bought them and sent them to me.  BEST SCRAPPY GIFT EVER!!

So there you have it, my kit trays.  Once I get the majority of the kit used up or am just ready to move on, I put all the stuff left into my stash and the next month's kit goes into the tray.

This method now means I don't need to store a lot of kits elsewhere but the few I do have from before are all in one of the blue cubes in my expedit:

Next post will be my new method for embellishments!  I hang them all on book rings.  It's new, I love it and I am USING UP so much stuff cause I can see it and it doesn't take me long to find anything.

Until then...

Jen


Tuesday, October 29, 2013

Jen's Studio - Expedit 4x4 unit - AKA the closet!

Welcome to Day 2 of my studio "tour".  Today I am going to show you the rest of my 4x4 Expedit unit that fits in the closet of my studio (see yesterday's post about my system for PL - BTW, watch this post for an explanation of how I store my PL page protectors!)

I am in the 4th upstairs bedroom on our house. As we are lucky enough to have spare room in the basement, I took over this room as my own. I could have taken the basement room but I wanted windows and light and to NOT be right there near the rec room and my kids.  They are 11 & 9 now and as they get older... they don't want their mom right there and I don't want to try to scrap while they are all screaming over video games :)

Here's the entire 4x4 unit.  See my Project Life stuff up there on the top L?  I have a ton of different things going on in this unit. The bottom blue bins have my kits, misc and a couple are actually empty now (I did a HUGE purge a few months ago).  The white boxes have stuff like extra embellishments, ribbon (which I rarely use but didn't want to get rid of) and one has all my envelopes and tags in it.  I also have my mini sewing machine and sewing kit in there, the green and purple kit (which I'll show a close up of later in the week!) is all small embellishments and then there is my paper.  See next picture!

Now, see the two red binders on the far right?  Those are my page protectors.  All my 12x12 are in one and my PL ones in the other.  I have an extra full box of Design A under all my core kit cards too (Michael's had a good sale! LOL) Makes it easy to grab and pull out what I need.  I mainly use Design A but occasionally use an insert of need a different orientation.

This is most of my paper.  I pared down to only 12x12 as I rarely do cardmaking anymore. Top is my cardstock sorted by colour.  Next down is all my patterned paper, also by colour.  I did a MAJOR purge on my pp too recently as I had so much I just was never going to use.  I also get a monthly kit so... it's all in a pile under my desk and I let the kids use it for projects.

Here's view of the top of my unit.  My PL stuff on the left.  The black and green cases are all prepped layout boxes.  Both full actually from my last crop as I did PL catch up and between that, classes and being sick... I never got to anything else :(

TOMORROW, I am going to show you the kits that are on top.  Those boxes are my Sept and Oct Noel Mignon kits and the 2nd on the right says "New Stuff". A catch all for new things I want to use (mostly pp).

Happy Scrapping!

Jen

Monday, October 28, 2013

Jen's Studio - Project Life

I hope to share with you a series of posts all about my current organizational system for my studio. I say current as it is ever evolving as my needs change or I see/think of/find a better system.

I found this amazing quote today that sums me up pretty well:

" Arrange whatever pieces come your way."
Virginia Woolf

I find my life and my ability to cope with my life is really helped by being organized and having an "everything in it's place" attitude.  Not everyone is like that, hey, I know some people who find this really stressful! But for me, I am MORE stressed out when things are messy, out of place or not organized.  So I try to find ways to help myself be settled without taking too much time, energy or space.

Here is how I am organizing my Project Life supplies:


 First off, my PL core kits. I've never actually BOUGHT my own core or mini kit. I've only shared with someone else.  I have several different sets thanks to a friend being willing to share (Thanks Sweet Scrapista!). I put them all in a core kit box standing up and used scrap paper and a label punch to make finding what I want easy.  The quote cards (from Elisa Blaha's blog FREE) are also there so I don't forget and are in front of my lined PL 3x4 blank cards.  This system also cost me nothing. Bonus!


For all my non-Project Life brand stuff I am using these monthly kit boxes from Studio Calico.  I signed up for their monthly kit subscription in the summer but only ended up getting 2 kits.  It seemed to me (this is just MY opinion!!) that the quality and amount of product in the kit diminished around that time and living in Canada the shipping time was just not acceptable. I wasn't receiving my kits until AFTER the next reveal which was NO fun at all. I complained but was told unless I bought more stuff (!!!!!) that was that for shipping speed. I was not cool with that so I paid the cancellation fee and got out.  But the boxes they came in are perfect for storing stuff. So all the 3x4 cards go in one and all the 4x6 cards go in the other. These are cards from the kits, from cut apart sheets, journalling pads from other manufacturers (like Basic Grey's new line of pocket-style scrapping).


Lastly, these both go together in an empty PL page protector box on top of my Expedit 4x4 cube shelf.  This unit is in the closet in my studio (a 4th upstairs bedroom in our home that I use as office/studio).  We took the doors off the closet and this fit right in.  I can then easily lift it out to work on my PL spreads.  I plan to also add a portable bag with basics to the back of the box (see Mercy Tiara's blog post on Bag in Bag - hoping to use her idea for this! - a portable PL kit with markers, stamps, adhesive, etc that I can take to other areas of the house and work on while my kids do school work.  It was like she READ MY MIND!!! I had just finished saying to my FB scrappy buds I wanted to build a kit like this and was figuring out what might work and BAM, she posted this about 4 days later.  I was stoked!)

Tomorrow I am going to show you the REST of this 4x4 unit and also how I store my monthly scrapbook kits (hint, Mercy Tiara helped me out AGAIN). They are right behind this PL box on top of the unit!

Happy Scrapping!

Jen

Tuesday, October 15, 2013

Project Life - Jen style

So as I posted a while back, I started Project Life (only in June... hard to believe as it feels like I've been doing forever now - in a GOOD way!).  I wanted to start posting my layouts on here with some regularity (notice I don't say weekly as... that is most likely not to happen as I tend to do monthly or biweekly at most!). I thought I'd do some catch up first and start with my first ever PL layout.  I didn't have any PL supplies with the exception of some page protectors, which I actually stole from my friend's PL baby album I was working on as her gift.

Here it is:

This was the week before the end of school and Father's Day weekend.  As I've mentioned, I am doing Project Life as this:

  1. Trying to keep each week to 1- 12x12 page protector.  Highlights only.
  2. I add these directly into my regular, chronological, family album. No special PL album. (I have a little video on this... need to figure out how to upload and edit!)
  3. The events that require/need/whatever a full layout get a full layout and as best fits they go beside, in front of behind the PL week they go with (and usually there is a highlight of same event on the PL page).
  4. I'm flexible!!! So sometimes with a long weekend the week gets a page and the long weekend gets it's own PL page too (so that week is 2 - 12x12 page protectors).  Or sometimes I do an insert (not often yet) if I have more to say or if there are sort of two themes to a week or something like that.
Things I'm trying to do to help me "keep up" with my PL but also my scrapbooking in general: (cause I am SUPER busy these days - aren't we all?! - and I just don't have the time I used to to scrapbook anymore)
  • download pictures at least once a month from all our sources (my phone, hubbie's phone, Nikon D90 and potentially my new little Nikon One -which I haven't been using... purely just not in habit to grab and need a case so I can put in my purse and leave it there!!)
  • have a supply of PL planning pages printed off so I can use. I scribble all over them and then tuck right into my album once I've sent those pictures off to be printed. Then when I can, I already know my plan (and usually as I'm planning I pick my cards too and put right into the page protectors...) and so...
  • when I have time, doing the PL pages is really a matter of cutting the pictures as needed and doing journalling and any extra embellishing I feel I need (which I don't have to really do ANY but of course, that's the fun part!!)
Last thing I want to now do... prep a portable PL "station".  Then when my kids are working on school stuff and don't need me I could bring it down and work on my stuff.  Then I'm not gathering a ton of stuff.  I need to really think about it but think it would include:
  • journalling pens
  • few washi tapes (neutrals, easy to use on most layouts)
  • scissors, tape runner, glossy accents
  • assortment of embellishments (think just grab my box instead of sorting out extra stuff)
  • small alpha stickers
If you have any suggestions, PLEASE, by all means leave me a comment on how to get this started.

I should be back tomorrow with a few more to share until we hit my recent stuff!!

Jen


Tuesday, September 24, 2013

Organizing - Why do I enjoy it so much?

Yes, I am one of those weird people who LOVE to organize.  And after 37 years of living, I figured out why.  I just work better in a tidy environment.  When my studio is a mess, I can't function well. I feel less inspired, I get distracted and it plain bugs me.  So, I'm always looking for new ways to organize my scrappy supplies because I am also a "if I can't see it, I don't use it" type scrapbooker.  Can these two ways of being co-exist happily?  I am still working on it but I have found ways that they can.

First, I am lucky enough to have a small 4th bedroom that I can use as my scrap space.  I took the doors off the closet and put a 4x4 Expedit Ikea cube bookshelf in there and it is right beside my work space.  So... I have a lot of my supplies right in there so I can grab them.  But I was finding, even right there, I was struggling a bit with my paper. Why? Cause all my paper holders were overflowing and stuff was crammed in so tight... it was a pain to look through or get stuff out.  Today, I PURGED.  Here is my lovely new cubes of paper.  Top is cardstock (12x12) and bottom is my patterned paper.


Cardstock is organized by neutrals and then ROYPPBG.  haha. I know, not exactly in sync with nature but I just found it works for me that way :) My apologies to rainbows.

I am donating a HUGE stack of paper and scraps to a lady at Crop for Kids this weekend. She does a volunteer program and was looking for supplies.  She won't know what hit her!!

I also bought the below organizer at Michael's recently.  A friend (Sweet Scrapista) had one when she was here recently and it looks SO handy.  I always take way too much stuff to crops and usually all shoved into pockets and bins, etc making it super hard to find.  So... ta da!!!  LOVE :)


From Left to Right: 
Row 1: Stars and arrows from PP/Heidi Swapp, Kelly Purkey flair (as they larger!), flair, flair (yes I have a problem), cork arrows, um, more cork.Row 2: wood veneer chevrons, wood pieces, wood buttons, wood arrows, wood cameras, wood stars, wood heart (yes, I like wood veneer!)Row 3: Shaped paper clips, sequins, twine, speech bubbles, tabs and labels.Bottom row: mostly larger tags from Elle's Studio and PL kits as well as some larger wood words.

I'll be back again tomorrow to show a few more organizing things I've done recently in my studio.  I especially love my book ring system that I developed to hang on my Clip It Up.  Making finding stuff FAST!!

Keep Scrapping!!

Jen


Wednesday, July 25, 2012

My paper stash

I signed up for this new class called "Pretty Paper Party" over at Shimelle.com and the first message/ ice-breaker challenge is to take a picture of your paper.  Your stash or your favourite piece or a bin of scraps or whatever you want.  She also talks about "types" of paper people so after reading that I feel I could label myself as:

  • a reformed Pattern Contender -used to not want to cut fav papers - now I say screw that!! Let's get pages DONE!!  Here's a good example of me perhaps finding a creative way to "save" a fav paper.  See that paper with "BE YOU."?  I loved it and didn't want to cover it up so I am mounting it on a 12x12 canvas and putting it up on the wall (love the nasty MESS on the floor).  I am painting the BE YOU. in in red as my room is all turquoise and red and the letters were hot pink.

  • I'm also a reformed Collection Packer - used to buy the paper packs from  a few fav companies and only make pages using those papers.  In THAT pack.  With THOSE stickers.  hee hee...  How did I cure that affliction??  I started getting page kits from companies that mix up companies and papers and FORCED myself to use them.  haha... now I love it and almost all my papers are sorted by colour rather than company.  But I'll admit, there are exceptions to that rule for a few companies (Echo Park, Crate Paper, Basic Grey) but I have had pretty itchy fingers lately and a teeny tiny voice in my head saying "sort them out.... pull the stickers... use those papers sister!!"

 L to R: themes (only for "boys", "winter/Xmas", "travel" and "school" as I was having issues finding those), 2 paper holders sorted by colour, 2 paper holders sorted by manufacturer, {next row} 12x12 cardstock, blue bin full (FULL yay!!) of kits. {next row are all card making stuff and 8.5 x 11 cardstock}
  • I AM a Paper Collector!  I love paper, it's really the cheapest part of scrapbooking if you only buy a few sheets but I have never had a conversation with a piece of paper before (that is a whole other level up from me... now my Thickers... pretty sure we've had several conversations!!)  You can see above my 4 shelves of paper (oh the shame!!!).  And okay, yes, it's actually 5 shelves of paper but the bottom one is 8.5x11 from when I used to be a Stampin' Up rep and did card classes.
  • And I am a Scrap Sorter.  Cause I'm an anal kind of person!!  Do the words "let's organize" send a thrill down your spine?? They do to me and yet... I'm also a super visual person so those two tendencies can to collide sometimes.  {I'm working it out... sigh}  Here's my scraps file, sorted by colour (cardstock and pp together - but yes, the pp is all at the back and cardstock all at the front, that is my anal-ness showing again)

So there you have it. My pretty long winded accounting to myself and the world about my pretty paper habits :) I'm just glad she didn't ask us to account for our letter stickers... that is where this all gets downright embarassing!!  (case in point, very top picture of the crap all over my floor... I count 8 alpha minimum in that stack of stuff, LOL)

Take to time to do something scrappy today... (or just go buy some new paper!)

Jen

Wednesday, October 7, 2009

Scrapbook room pictures

Here are my new tables!! Kind of hard to see but a corner and a long. My Ikea rails for my punches, my Becky and Lisa rails for my tools and a Clip It Up for my alpha stickers and bling. I am still working on finishing up so this will be pretty soon.
My expedit 4x4 cube bookcase - still a work in progress! My MM wall unit with ribbon, paints, buttons, flowers and chipboard.
Cards I made in the class at the Scrapbook Carnival in Edmonton this past weekend. Also the ornament card was a make N take from a SU booth. I don't have that set so wanted to try it out!

*BLUSH* Between all the stores at the carnival and another online order... these are all the alpha stickers I picked up in the last 4 days. The top left is Jillybean Soup, then Storytellers, MM and Jenni Bowlin(x3), bottom row are Thickers and the right bottom is Doodlebug.